Have you wondered how you could add your Blog Beast to Google Webmaster Tools? Now that you can map a domain name to your Empower Network blogging system, you can also add the blog to webmaster tools. In this tutorial I am going to show you step by step how I do it with my domain name registrar, which is Namecheap.com.
Note that you can’t add your Blog Beast original URL gmichel.empowernetwork.com, which contains your username as a subdomain. Google Webmaster Tools have different methods for you to confirm that you own the site, but none can be applied with the Empower Network subdomain. You will need a valid registered domain name and access to the control panel of the domain.
Add your Blog Beast to Google Webmaster Tools
You will need a Google account to login here: Webmaster Tools
If you already have websites there you will see them.

Click on the “ADD A SITE” red button. This pop-up window will show.
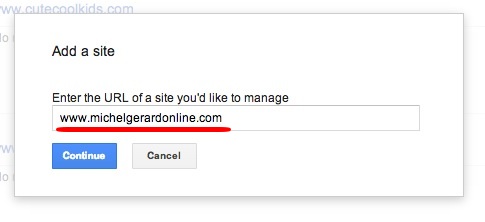
Add your Blog Beast domain.
Webmaster tools will present you with a recommended method to verify your ownership of the website with a step by step guide. It will most likely be “Domain Name Provider”.
You can see that it selects automatically the registrar, which is NameCheap for me.
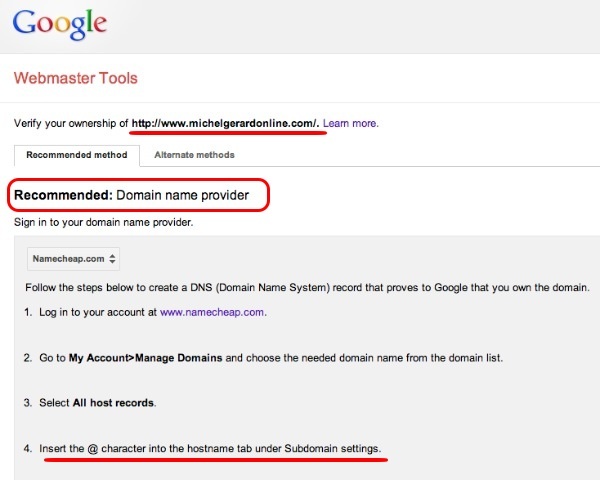

After you have followed the steps, the last thing will be to click “VERIFY”.
Let’s see how to set this up on Namecheap.com.
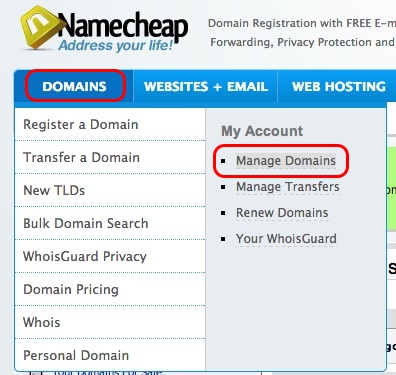
Login into your NameCheap account and then go to Domains >> Manage Domains.
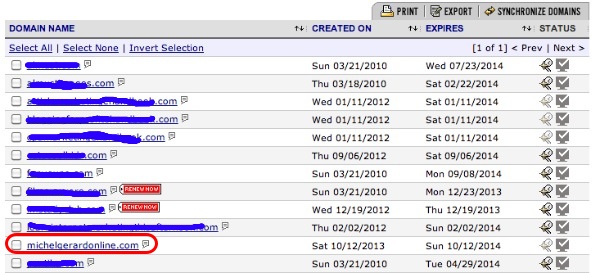
All the domains you have will show, click on the one you use for the Blog Beast.
And then click on “All Host Records”.
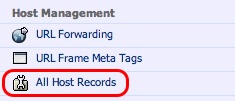
It is where you have to enter the values given in points 4, 5 & 6 of the guide.
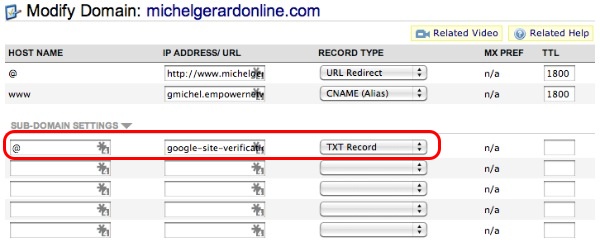
See the 3 elements that are circled in red under the sub-domain section.
Then click the “Save Changes” button

You domain is now set to be verified with Google Webmaster tools.
Back to Google Webmaster Tools

Click “VERIFY”.

Your Blog Beast will show on the page after it has been verified.
Click the URL to access the tools.
I hope this helps.


