Installing WordPress with Softaculous is very simple and can be done in under two minutes. Softaculous is a script that you find in most hosting accounts that enables you to install applications like WordPress in just a few clicks. If you want to install a WP blog on your server read on this WordPress Softaculous installation tutorial.
First, you need to make sure that your hosting account has Softaculous before purchasing. If this is the case, login into your control panel: cPanel.
Your control panel is located at https://domain.com/cpanel or https://domain.com:2086
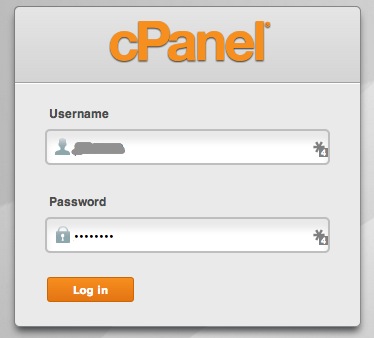
Enter your username and password and click “Log In”.
When you purchase hosting all the details on how to login to your cPanel is indicated in the first email you receive.
This is the Control Panel
You have many options available in cPanel, but Softaculous is located down the page in the section Software/Services.
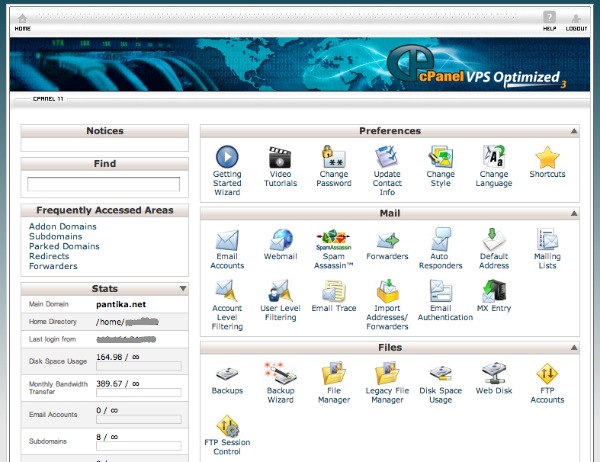
In the section Software/Services you now can see Softaculous.

You may also see a section like this showing all applications that Softaculous can install.
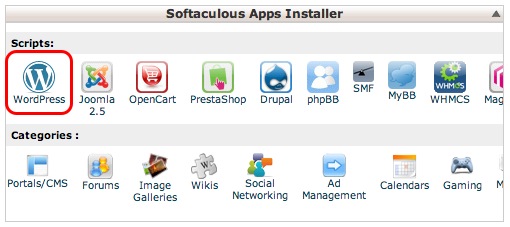
WordPress is the first to show.
You can click on this WP button or the Softaculous button to get to the script.
WordPress Softaculous Installation
The menu at the right shows all the different categories of scripts. Click on the first one “Blogs”.
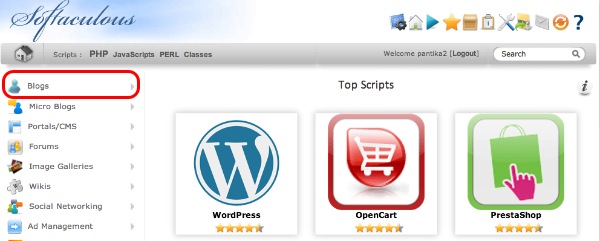
The menu expends.
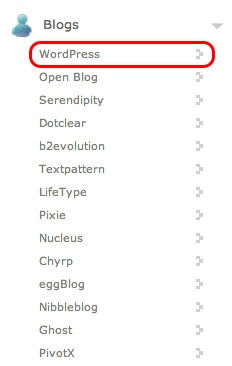
You can see that there are 14 kinds of blog scripts that you can install automatically. WordPress is the most popular.
After you have clicked the “WordPress” link you will see the Overview page.
The WordPress version is shown as well as any other blog you may already have installed.
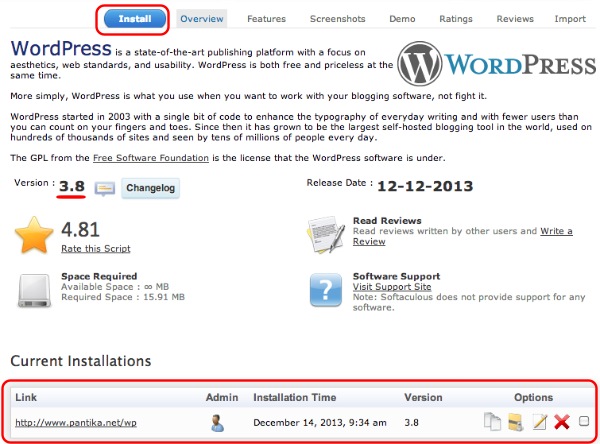
In this example, there is a current installation on domain www.pantika.net in directory wp.
I am now going to show you a new WordPress Softaculous installation.
Click the blue “Install” button to get to the following page.
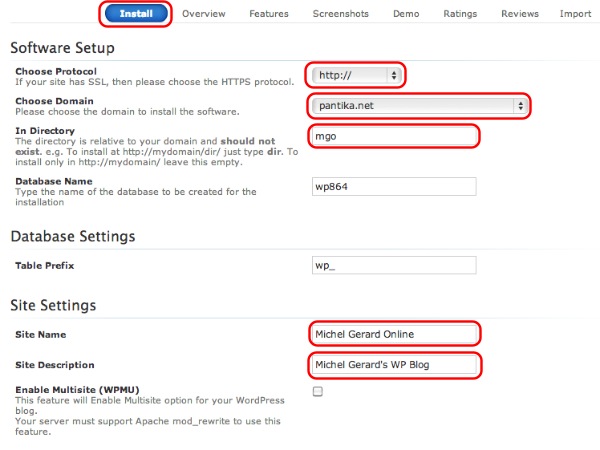
Then, choose https:// or https://www.
Choose the domain if you have more than one in the hosting account (pantika.net).
The third step is very important.
If you want to install the blog on the domain, say “pantika.net”, leave the field blank.
If you want to install in a directory, write a name. It could be “blog”, I chose “mgo” for this example. This directory should not be an existing directory, but a completely new one.
“Database Name” and “Table Prefix” can be left as they are.
Then enter “Site Name” and “Site Description”. This can be changed later in the WordPress interface.
Now lets see the remaining options.
Chose a username and password for WordPress. It has to be different of your cPanel username and password. When you see “Strong” in green, you are good.
Also enter your admin email address.
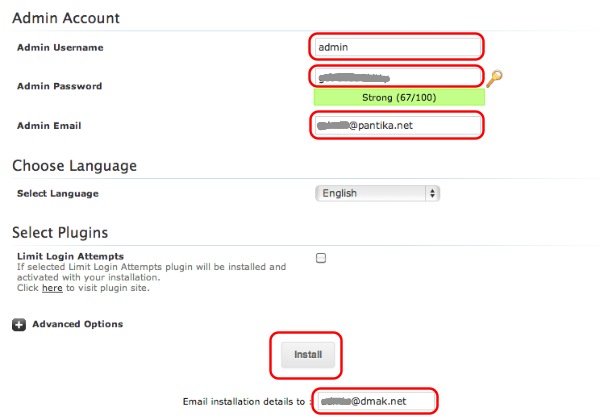
If your language is other than English you can change this in the menu. Enter an email for a report on the installation if you wish, and click “Install”.
10 seconds later… you get this!
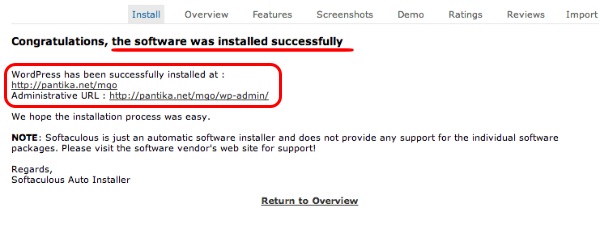
A WordPress Softaculous Installation is that easy.
You have 2 links, one for the blog and one for the admin section.
This is the blog.

See the blog here.
and this is the Admin section.

It is where you enter your previously chosen username and password to work on your blog.
On this page, click on “Return to Overview”.

You will now see your blog installed and any other previous blog.

You can install any number of blogs providing you are using a different directory for each one.
Deleting a blog is as easy as creating one, just click the red cross.
In order to return to the cPanel of your hosting account click on the icon circled in red below.

Or you may just logout using the link provided.
I hope you enjoyed this tutorial.
A WordPress Softaculous installation is not as difficult as it seems.


