In the previous post I showed you how to use LastPass to register for multiple Safelists very fast and save your login information. Today, I am going to show Safelist Marketing tips to send your email messages very quickly in just a couple of clicks.
If you have an average of 30 Safelists to email to everyday, you imagine how long it can take to copy and paste your subject, your email body and your link in each mailer… LastPast can help you to do it fast.
Safelist Marketing Tips – Sending your Email message
If you have missed tip 1 and 2, click here.
3) LastPass – Sending emails
You just have to set this once and you will be able to post your ad to all Safelists very fast.
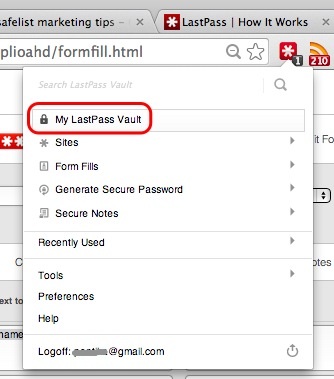
Locate the LastPass icon on the toolbar and click “My LastPass Vault”.
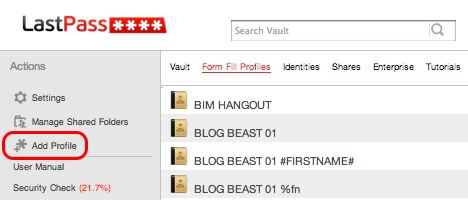
The vault opens. Click on the “Form Fill Profiles” link and then “Add profile”.
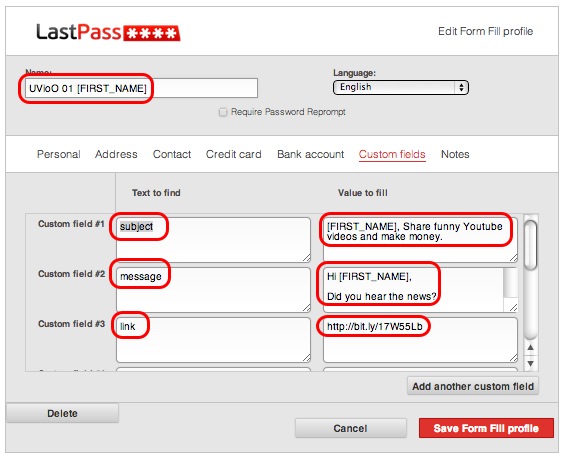
A new profile will opens. Click on the “Custom fields” link and give a name to the profile.
In this case I gave the name UVIoO, one of the program I am promoting.

Then I filled in the 3 fields: subject, message and link.
The “Text to find” custom fields are the fields located in the form of the Safelists and the “value to fill” are the details of the email message.
There are more than 3 “Text to find” fields to create.
They are:
subject
message
bodytext
AdText
txt_msg
link
txt_affiliate_url
frmEmailText
MEMBERURL
https://
url
These 11 custom fields work in most mailers, you may add more. When you are done click on “Save Form Fill Profile”.
Message Personalization
Safelists use different codes to personalize your email messages and have the first name of the Safelist member show in the message and the subject like: “Hello Mike,”
The codes are:
#FIRSTNAME#
%fn
[[first_name]]
[FIRST_NAME]
[fname]
{FIRSTNAME}
~fname~
The previous message you set up in LastPass was the default message for the Safelists that have personalization disabled. Now you can repeat the process and create a profile for each personalization type.
Look at what I have:
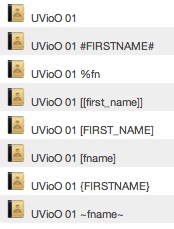
Just repeat the process shown earlier for each code. In this example [FIRST_NAME].
Now it’s time to send your email in the Safelist mailer.
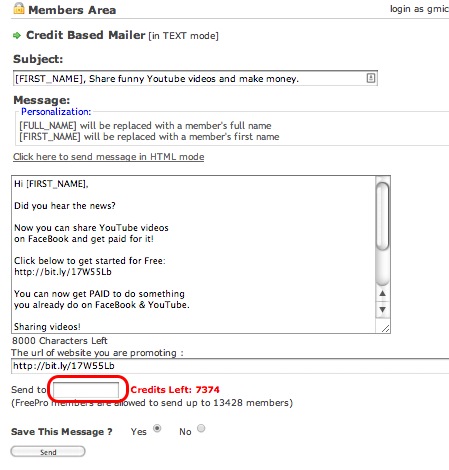
The Subject, Email message and URL fields are automatically populated when the profile “UVioO [FIRST_NAME]” is selected. You just have to enter the number of credits you want to use and click the “Send” button. Each mailer indicates the code that has to be used for personalization and you just have to use the corresponding LastPass profile.
Simple and fast… enjoy!
Let me know if these Safelist Marketing Tips are useful to you in the comments below.