You have learned in the previous tutorial how to attach a domain name to your blog in setting up your CNAME and DNS on the registrar. In this Blog Beast tutorial you are going to learn how to create other blogs. The Empower Network’s viral blogging system enables you to create multiple blogs in just a few clicks.
Missed the previous tutorials?
Read previous Blog Beast Tutorial.
Read first Blog Beast Tutorial.
Blog Beast Tutorial 8
Go to the login page located here and log in.
No need now to remind you how to access your blog’s setting options.
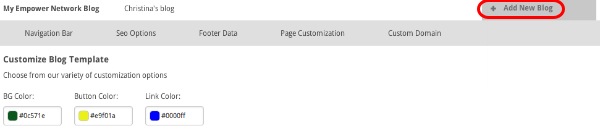
You can see in the screen shot below that I already have a second blog created. I am now going to create a third blog in this Blog Beast tutorial.
Click on the “+ Add New Blog” link.
You will see this page.

If you have a custom domain name for this new blog, you will have to follow the previous tutorial.
Step 1: Enter a name for your Blog. The Sub Domain field will show automatically.
In this example I am creating a blog with the name “Cute Cool Kids”.
cute-cool-kids automatically shows as a sub domain of empowernetwork.com.
If the sub domain is available, “Available” will show in Green at the right. If it is not, “Unavailable” in Red will be shown.
You can change the suggested subdomain until it becomes available, or use something totally different from your Blog Name.

Click the “Next” blue button.
This message will then show to acknowledge that your new blog has been created.

Usually, you can see the new blog almost immediately. It will be a default empty blog that you will have to customize to your liking the same way you did for your main blog.
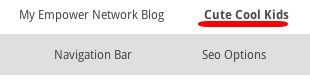
You will see a new link in the menu next to your main blog.
Here it is “Cute Cool Kids”.
Click on it to customize your new blog.
Read corresponding Blog Beast Tutorial.
You should see that your default profile image shows on the new blog.
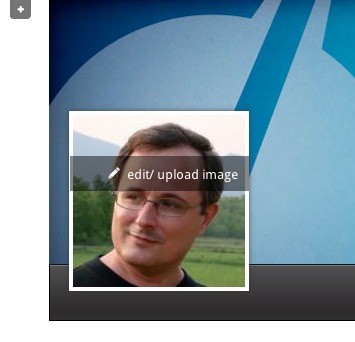
Hover the image and click “edit/upload”.
The image of your main blog shows.

Click “Browse”, select the image you want for the new blog.
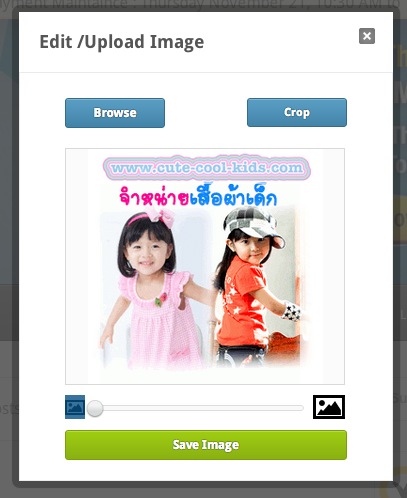
You can slide left or right to adjust the dimension of the image.
Click the “Save Image” green button.
This is the result.
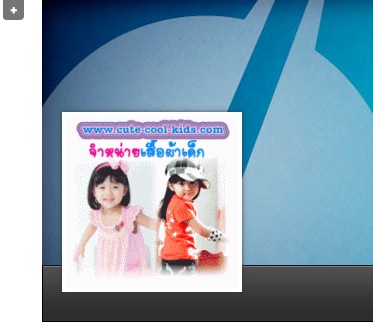
You have now a new image showing on the blog.
How to make a blog post to your new blog?
Go to your activity feed back-office.
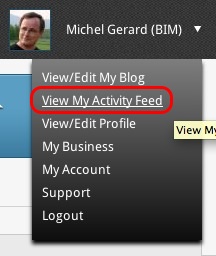
You will see the 4 blue buttons.
Select the first one to make a “Text” blog post.

Enter your title and blog post.
Select Public Blog to have the post show on your blog.
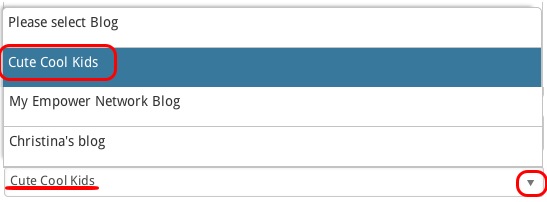
Then, click on the little down arrow to select the blog you want to post to.
You will see a menu with all your blogs.
Select your new blog.
Finally create new categories for your new blog.
Click the “Publish” blue button.
![]()
You will see the post in your Activity Feed immediately after and on the new blog.
Visit your new blog to check it is there.
Have fun!
I hope this tutorial will be useful to you and I will see you in the next Blog Beast tutorial.
CLICK HERE TO GO TO THE NEXT TUTORIAL
If you have questions, comment below.
What? You still don’t have the blog Beast?
Click the button below

or
Get it here.