You have learned in the previous tutorial how to create additional blogs in your Empower viral blogging system. In this Blog Beast tutorial you are going to learn how to change the 3 main banners on the blog and link them to the landing page of your choice.
The Blog Beast or ENV2, which is the latest version of the Empower Network’s viral blogging system is specially designed for business entrepreneurs.
Missed the previous tutorials?
Read previous Blog Beast Tutorial.
Read first Blog Beast Tutorial.
Blog Beast Tutorial 9
Go to the login page located here and log in.
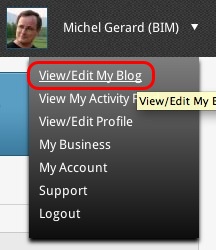
Click on View/Edit My Blog.
If your blog is about cats, for example… or fishing… one thing you should do is replace the 3 banners by something related to your topic. They can be linked to any page you desire.
The 3 banners on the Blog Beast are:
The top Banner.

Size: 960 x 265
The side Banner
Size: 312 x 555
The bottom Banner

Size: 960 x 188
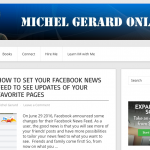
These 3 banners are designed to make you money selling the Empower Network’s viral blogging system 2.0. They are linked to the Empower squeeze pages that collect leads for you. If you are an Empower affiliate, you may want to leave them as is.
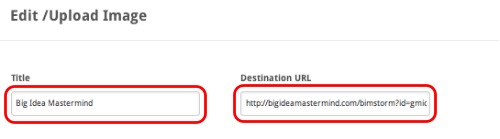
As an affiliate you may want to link them to another custom squeeze page, or change them to represent your team in Empower Network. It is what I did for my top banner. I created a new banner with another headline and my team logo “BIM” for Big Idea Mastermind. I also made the banner go to one of the BIM’s squeeze page.
Blog Beast Tutorial Step by Step:
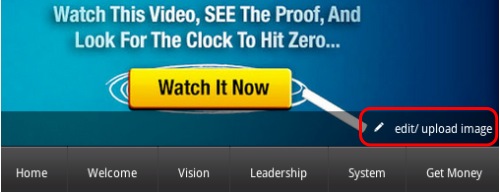
You are going to change the top banner.
Hover the banner and click “edit/upload image”.
A pop-up shows.

Notice that the new image has to be of the same size: 960 x 265. The format also have to be JPG, JEPG, PNG or BMP.
Type a title for your image and destination URL (with https://).
If you want to keep the same banner, just click the green “Save” button. The original banner will then link to a new location.
If you want to change the banner, click “edit/upload image”.
Locate the image on your computer.
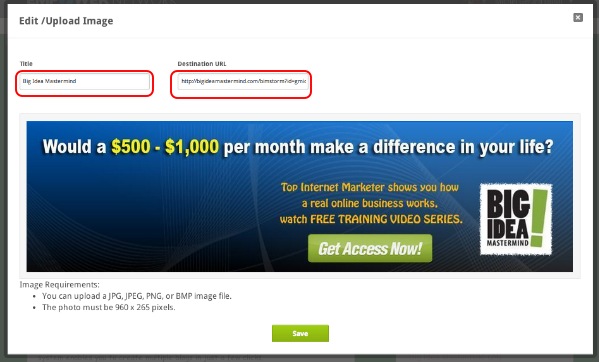
Make sure the new banner shows on the page and that you have your “Title” and “Destination URL” entered.
Click the green “Save” button.
And this is the result.

Click here to see my Blog Beast.
That’s the same process for the two other banners.
I hope this tutorial will be useful to you and I will see you in the next Blog Beast tutorial.
CLICK HERE TO GO TO THE NEXT TUTORIAL
If you have questions, comment below.
What? You still don’t have the blog Beast?
Click the button below

or
Get it here.